docker基础
01、Docker简介
02、Docker的安装(通过yum安装)
03、Docker安装的问题补充
04、Docker的安装(通过RPM软件包)
05、Docker的安装(通过脚本安装)
06、Docker的卸载
07、Docker配置阿里云镜像加速器
08、Docker中的基本概念和底层原理
09、Docker常用命令(帮助命令)
10、Docker常用命令(镜像命令)
11、Docker常用命令(容器命令01)
12、Docker常用命令(容器命令02)
13、Docker常用命令(容器命令03)
14、Docker安装Nginx
15、Docker图形化管理工具Portainer
16、Docker镜像讲解
17、Docker镜像分层的理解
18、Docker镜像的commit操作
19、Docker容器数据卷介绍
20、Docker容器数据卷的应用
21、Docker中数据卷相关命令
22、Docker数据卷实现MySQL数据持久化
23、DockerFile的方式挂载数据卷
24、Docker数据卷容器的说明与共享数据原理
25、DockerFile文件详解
26、Docker实战:自定义CentOS镜像
27、CMD指令和ENTRYPOINT指令的区别
28、ONBUILD指令介绍
29、COPY指令和ADD指令
30、自定义Tomcat9镜像
31、发布镜像到DockerHub
32、将本地镜像推送到阿里云
33、补充:save和load命令说明
34、Jenkins + Docker + Github 自动部署
本文档使用 MrDoc 发布
-
+
首页
02、Docker的安装(通过yum安装)
CentOS环境下的Docker官方推荐的三种安装方式 - yum安装方式 - 脚本安装方式 - 本地rpm安装方式 ### **前提:** - Docker要求CentOS系统的内核版本高于3.10。 通过 uname -r命令查看你当前的内核版本 ```shell [root@localhost ~ ] # uname -r 3.10.0-957.el7.x86_64 ``` - Docker目前分为两个版本: Docker CE(社区免费版) Docker EE(企业版,强调安全,但需付费使用) 注意:我们安装的版本为社区版。 - Docker 官方文档也可以查看详细的安装方式: [https://docs.docker.com/install/linux/docker-ce/centos/](https://docs.docker.com/install/linux/docker-ce/centos/ "https://docs.docker.com/install/linux/docker-ce/centos/") ### **1、通过yum安装Docker** 通过yum安装Docker,也就是使用Docker镜像仓库进行安装。 在新主机上首次安装Docker Engine-Community(docker-ce) 之前,需要设置Docker仓库。之后就可以从仓库安装和更新Docker。 ------------ 1. 更新yum包 在新安装的CentOS 7中,一定要先更新yum包。 ```shell sudo yum update ``` ------------ 2. 移除旧的Docker版本 如果之前安装过旧版本,在安装前一定要执行一下下面的命令。 ```python sudo yum remove docker \ docker-client \ docker-client-latest \ docker-common \ docker-latest \ docker-latest-logrotate \ docker-logrotate \ docker-selinux \ docker-engine-selinux \ docker-engine ``` 如果出现下面提示,则证明没有安装过之前的旧版本。 ```python 已加载插件:fastestmirror 参数 docker 没有匹配 参数 docker-client 没有匹配 参数 docker-client-latest 没有匹配 参数 docker-common 没有匹配 参数 docker-latest 没有匹配 参数 docker-latest-logrotate 没有匹配 参数 docker-logrotate 没有匹配 参数 docker-selinux 没有匹配 参数 docker-engine-selinux 没有匹配 参数 docker-engine 没有匹配 不删除任何软件包 ``` 3. 安装必须的软件包 - 安装yum-utils提供yum-config-manager功能。 - 同时安装的device-mapper-persistent-data和lvm2,用于devicemapper存储设备映射器,这是必须的两个软件包。(最新官方文档上没有要求安装这两个软件包) ```python sudo yum install -y yum-utils \ device-mapper-persistent-data \ lvm2 ``` ------------ 4. 设置稳定yum源仓库 给yum配置一个稳定(stable)的仓库(也可以是镜像仓库)来下载Docker。 官方Docker镜像源地址(不推荐) ```python sudo yum-config-manager \ --add-repo \ https://download.docker.com/linux/centos/docker-ce.repo ``` 因为网络的原因经常下载失败: 报错: ```python 1[Errno 14] curl#35 - TCP connection reset by peer(TCP链接被打断) 2[Errno 12] curl#35 - Timeout(链接超时) ``` 阿里的Docker镜像源地址(**推荐**) ```python sudo yum-config-manager \ --add-repo \ http://mirrors.aliyun.com/docker-ce/linux/centos/docker-ce.repo ``` ------------ 5. 更新yum软件包索引 ```python sudo yum makecache fast ``` 这个命令是将软件包信息提前在本地缓存一份,用来提高搜索安装软件的速度。 通常在更新yum源或者重新配置yum源之后,使用该命令生成缓存。(推荐执行一次该命令) ------------ 6. 开始安装Docker-ce - 安装最新版本的Docker-ce ```python sudo yum -y install docker-ce ``` - 安装指定版本的Docker-ce ```python #执行:$ yum list docker-ce --showduplicates | sort -r docker-ce.x86_64 3:18.09.1-3.el7 docker-ce-stable docker-ce.x86_64 3:18.09.0-3.el7 docker-ce-stable docker-ce.x86_64 18.06.1.ce-3.el7 docker-ce-stable docker-ce.x86_64 18.06.0.ce-3.el7 docker-ce-stable ``` - 选择指定的版本安装。 ```python 执行:$ sudo yum install docker-ce-+版本号 例如:$ sudo yum install docker-ce-18.03.1.ce ``` 注意: 官方文档中安装Docker需要安装docker-ce、docker-ce-cli、containerd.io三个软件。我们直接安装docker-ce就好,其他两个软件会自动匹配版本进行安装。 ```python sudo yum install docker-ce docker-ce-cli containerd.io sudo yum install docker-ce-<VERSION_STRING> docker-ce-cli-<VERSION_STRING> containerd.io 如:$ sudo yum install docker-ce-18.03.1.ce ``` ------------ 7. 查看Docker版本信息 ```python sudo docker version ``` ------------ 8. 启动Docker ```python sudo systemctl start docker ``` ------------ 9. 查看Docker状态 ```python sudo systemctl status docker ``` 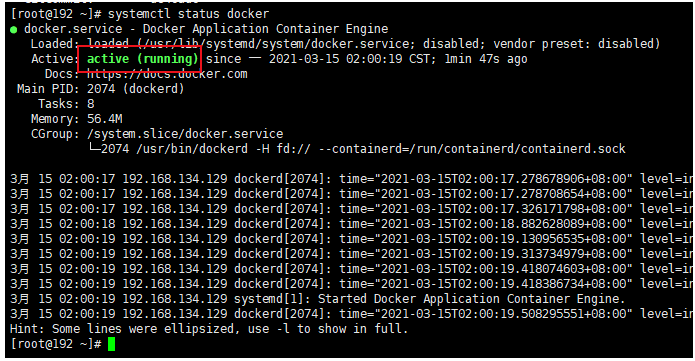 ------------ 10. 加入开机启动 ```python sudo systemctl enable docker ``` ------------ 11.验证Docker是否正确安装 通过运行hello-world镜像来验证是否正确安装了Docker Engine-Community。 ```python $ sudo docker run hello-world # 出现下面显示,证明运行镜像成功 Unable to find image 'hello-world:latest' locally(本地没有找到hello-world镜像) latest: Pulling(拉取) from library/hello-world(去远程拉取library/hello-world镜像) 1b930d010525: Pull complete(拉取完成) Digest: sha256:d1668a9a1f5b42ed3f46b70b9cb7c88fd8bdc8a2d73509bb0041cf436018fbf5 Status: Downloaded newer image for hello-world:latest (上面三行是拉取镜像的签名信息) Hello from Docker!(镜像运行起来了) This message shows that your installation appears to be working correctly. (此消息表明您的安装似乎可以正常工作。为了生成此消息,Docker采取了以下步骤:) To generate this message, Docker took the following steps: 1. The Docker client contacted the Docker daemon. 2. The Docker daemon pulled the "hello-world" image from the Docker Hub. (amd64) 3. The Docker daemon created a new container from that image which runs the executable that produces the output you are currently reading. 4. The Docker daemon streamed that output to the Docker client, which sent it to your terminal. To try something more ambitious, you can run an Ubuntu container with: $ docker run -it ubuntu bash Share images, automate workflows, and more with a free Docker ID: https://hub.docker.com/ For more examples and ideas, visit: https://docs.docker.com/get-started/ ``` ------------ 12. 查看本地Docker镜像 ```python $ sudo docker images REPOSITORY TAG IMAGE ID CREATED SIZE hello-world latest d1165f221234 8 days ago 13.3kB ``` ------------ 13. 停止Docker运行 ```python $ sudo systemctl stop docker ``` 至此Docker安装完成。
李智
2025年3月17日 13:22
转发文档
收藏文档
上一篇
下一篇
手机扫码
复制链接
手机扫一扫转发分享
复制链接
Markdown文件
分享
链接
类型
密码
更新密码